
Google Street View APK for Android
How to Install the APK For Google Street View?
If you’ve downloaded the official Google Street View APK for Android, you’ll want to know how to install the APK for the application. This application modifies the default Google Street View APK to provide additional features for the app, including the ability to view Wi-Fi networking information. To install the APK, you must first uninstall the original version of the application. Then, download and install the free version. After the installation, you’ll need to enable “Unknown sources” on your device to install applications, not from the Play Store.
Create photo spheres with Google Street View:
To create photo spheres from Google Street View, you must have an Android device with 4.4 or higher. To do so, download the app Photo Sphere Camera from the App Store. Alternatively, you can also download the Google Camera app. However, you should keep in mind that the latter is more suitable for photo spheres. Regardless of the format, you should know the basics to create a photo sphere.
To create a photo sphere, you must first create a 360-degree panorama by taking a series of overlapping photos. Then, you should use panoramic stitching software to convert the panorama into a photosphere. The software also helps you to edit the panorama with the help of metadata. After you have completed the panorama, you can share your photosphere by using the Google Street View tool. Once you have done so, you can use the Street Sphere generator to create a custom Street View code.
Connect Individual Photo Spheres:
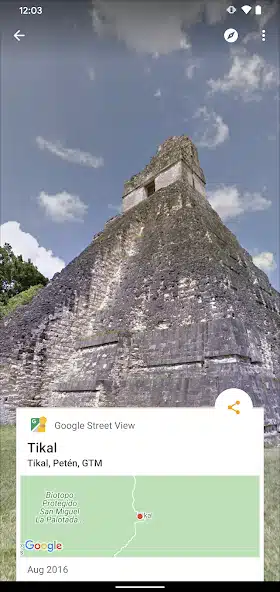
Using Google Maps, you can then connect individual photo spheres to create a connected photo sphere tour. Google Maps offers a dedicated page for photo spheres. The site also provides a list of popular photo spheres. Popular photo spheres include the ancient Mayan Palace at Palenque in Mexico, the Seychelles coastline, and the town that was destroyed by the Fukushima nuclear reactor in Japan.
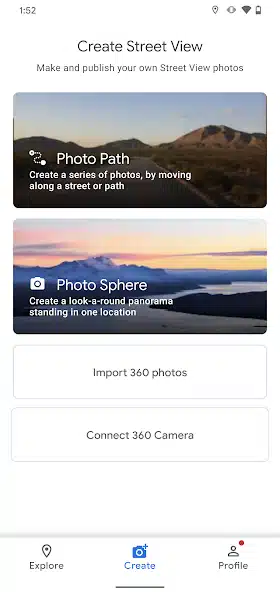
To create photo spheres from Google Street View, you must first connect the 360-degree camera with your phone. After that, you should open the Street View app and select the camera under the Create tab. To create a high-quality HDR photosphere, use the High Dynamic Range feature. This combines three photos of the same scene taken at different exposures. HDR photos are also a good choice for photo galleries, so be sure to make sure your phone has enough memory to store the photos.
Android Application:
In addition to Google Maps, you can also create photo spheres with the Android application. This app will automatically stitch together multiple photos. You can also nudge yourself to take more photos by showing a progress bar. Once you are satisfied with the result, you can post the photo spheres on Google Maps or save them on your camera roll. You can also post your photo spheres on the Web using these apps.
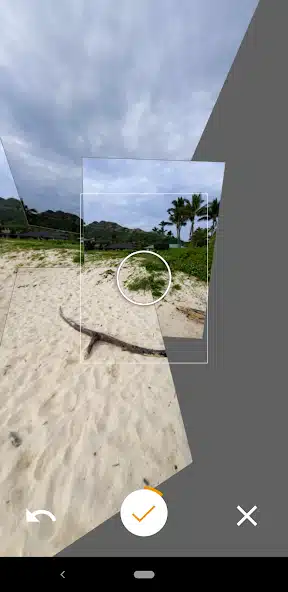
To create photo spheres with Google Street View, download the app. Once you have downloaded the app, you should turn your camera around and point it to a specific location. You should then press the little 1 icon on the screen to select the photosphere location. You can also pinch the screen to zoom in and out. Once you have finished, click the checkmark icon to confirm the location. You will be taken back to the app and have the option to publish your photosphere. When you finish, you should wait for your phone to connect to Wi-Fi before publishing the photosphere.
Create 360-degree panoramas with your phone’s camera or certified Street View Ready camera:
In order to create a 360-degree panorama, make sure your phone’s camera or Street View Ready camera has plenty of free space. It depends on your phone’s settings, but the more free space you have, the better. Then, position your phone in a circle. Once you’re done, you can go back and undo any mistakes. Once you’re happy with your panorama, share it with friends and family.
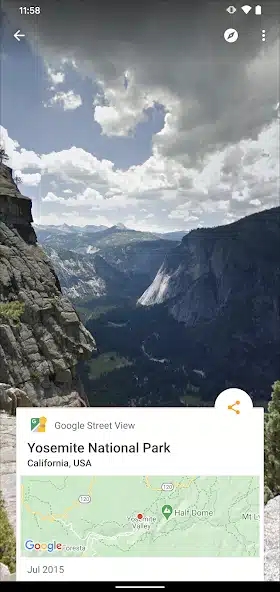
Regardless of your level of experience with photography, you can create a panoramic photo by using Google Street View. There are numerous apps available to create a photosphere. These applications allow you to take 360-degree panoramas of any area on the Earth using your smartphone camera or certified Street View Ready camera. While they are not perfect, they can be fun, unique ways to share your experiences.
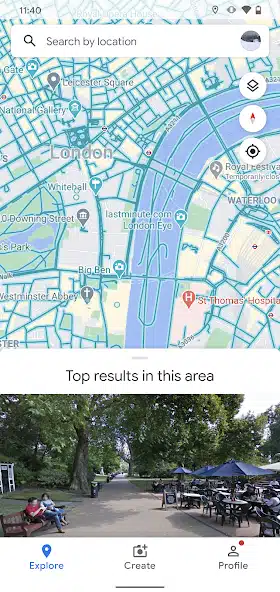
To get started, you can download the Google Street View app, which comes with a built-in 360-degree camera. You can then explore 360-degree panoramas created by photographers around the world. Once you’re finished, you can share your 360-degree panoramas using Facebook and Instagram. Using the app, you can share your panoramas to Google Maps. Just follow the instructions to select a location and click the “Send to Street View” button.
Easy Interface to use the Application:
If you’re not an expert photographer, the Photaf Panorama Pro app makes the process easy. It uses the orientation sensor on your smartphone to determine the exact angle at which each shot was taken. Afterward, you can move your phone around to see the complete panoramic view. The app also has an easy-to-use interface for sharing 360-degree panoramas on social media.
Another option is to use a certified Street View Ready camera and a compatible smartphone. There are plenty of apps available for this purpose. These apps work well with the Street View app and can be used to share your panoramas with friends. If you have an Android smartphone, the Photaf app allows you to share your panoramas on Facebook and other social media. For an extra fee, you can also use the Photaf Pro version to upload your 360-degree panoramas on the company’s website, as well as view your images on your computer. You can even make your images HD live wallpapers and share them on social media sites.
Once your panoramic video or photo has been completed, you can upload it to Google Street View. The panoramas will be published on Google Street View as part of the Local Guides program. To share your panorama, all you need is a phone and an internet connection. This is the fastest way to share your panoramas with the world! Keep up posting them to get more people to view your pictures!
Configure the Street View panorama via XML:
To configure the Street View panorama on your web application, you can create an XML file. This file should contain parameters such as pan and zoom. For each parameter, you should include the name of the panorama. You can also use code to disable street names, pinch zoom, and street names. By adding these parameters, you will be able to control how your users see the panoramas. The API will return the best match based on the values you provide.
If you do not wish to use XML, you can also create an XML file that defines the settings of your application. In this file, you need to include the StreetViewPanorama object. You can also use the StreetViewPanoramaFragment or -view to add a panorama to an Android fragment. XML files for panoramas can be downloaded from the official website.
Initialize your Street View:
After initializing your StreetView, you can configure it using the XML file. You can also enable panning gestures for your users. Once your street view is initialized, you can control it by configuring its controller. Set the onStreetViewCreated callback. The StreetViewController is the primary object that controls the StreetView. It can be used for panning gestures and to enable the user to move to other panoramas.
To publish your 360-degree photos, you must create a street view panorama with quality of 7.5MP (4K), a 2:1 aspect ratio, and at least 75 megabytes. The Street View app provides you with photo filters and controls. Once published, your 360-degree photos are stored in the Geo Panoramas folder in Google Photos. After you delete your 360-degree photo, it cannot be recovered.